
Quick answer: Simulator makers commonly recommend about 10 to 12 feet of width at minimum and 14 to 16 feet ideally, about 15 feet of depth at minimum and 18 to 20 feet ideally, and a ceiling of 9 to 10 feet. Keep the tee about 8 to 12 feet from the screen, and plan the PC location and cable paths at the same time as the layout.
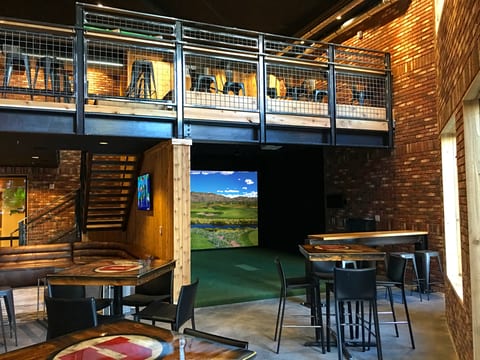
How much space do you need for a golf simulator? Every simulator maker publishes a table of minimum and ideal room dimensions, and those tables are a genuinely useful starting point. What most of them skip is what happens after the tape measure comes out: where the sim PC and switcher actually sit, how the video signal gets from that equipment to the projector and any extra screen, and what to pull through the walls while they are still open. This guide covers both halves of golf simulator room layout, starting with the dimension ranges the major launch monitor makers publish, then walking through the layout and wiring decisions that turn a measured room into a working bay.
Whether you are building a new simulator room from scratch, converting a garage or basement, or adding a bay to a commercial facility, the underlying planning process is the same: get the dimensions right first, then work out where the equipment and cables go before the walls close up. Skipping either step tends to show up later, either as a launch monitor that cannot see the whole swing or as a video cable that has to be fished through finished drywall.
Minimum and ideal golf simulator room dimensions
Room size is the first constraint on a golf simulator project, because it decides which launch monitor, screen and projector will actually fit and work together. The table below gathers the ranges that simulator makers commonly publish for width, depth, ceiling height and the distance from the tee to the screen.
| Dimension | Minimum | Ideal | Why it matters |
|---|---|---|---|
| Width | 10 to 12 ft | 14 to 16 ft | Room for a full swing, including left-handed players who need the same space mirrored to the other side |
| Depth | About 15 ft | 18 to 20 ft | Space for the golfer, the distance from the tee to the screen, and room for the launch monitor |
| Ceiling height | 9 ft (8.5 ft workable for irons or shorter golfers) | 10 ft | Room for a full swing with a driver |
| Tee to screen | About 8 to 12 ft | Gives the ball room to reach the screen safely and leaves space for the enclosure | |
These ranges come from TruGolf and TrackMan, two of the launch monitor makers publishing this kind of guidance. Ranges vary by launch monitor, so treat the ideal figures as a comfortable target rather than a fixed spec, and confirm the exact space your chosen launch monitor needs before you commit to a room. At the low end, some simulator makers list 8 feet as an absolute floor for ceiling height, workable mainly with a compact launch monitor and irons-only play (Foresight Sports).
How the launch monitor changes the room
The ranges above assume a typical launch monitor in a mid-size room, but the type of launch monitor you choose changes which dimension actually limits your room.
Radar-based launch monitors sit behind the golfer, which is why they need extra depth: place one in a room that is already tight front to back and it may not have enough room behind the tee to read the shot accurately. Overhead camera units solve the depth problem by mounting above the hitting area instead, but that shifts the limiting factor to ceiling height, since the unit needs enough headroom above the swing to see the ball at impact. Side-mounted units, sitting beside the tee rather than behind or above it, shift the limiting factor again, this time to room width, since they need open space to one side of the golfer.
None of this changes the basic ranges in the table above, but it does mean the dimension that actually limits your specific room depends on which launch monitor you buy. Always check the installation specification the launch monitor maker publishes for your exact model before you finalize a room. A launch monitor that needs more depth, more headroom or more width than a generic table assumes will not show up until you check the maker's own numbers, and that is a far cheaper thing to catch on paper than after the room is built.
This is also why a room that meets every number in the table above can still feel tight with the wrong launch monitor, and why a room slightly under the ideal ranges can still work well with the right one. Treat the table as a starting point for shopping, not a substitute for reading the specification sheet of the exact unit you plan to buy.
Laying out the bay, the lounge and the equipment
Once the room dimensions work on paper, the next step is deciding where everything goes inside those walls. A simulator bay breaks down into five zones, and getting their relative positions right matters as much as hitting the overall square footage.
The screen and enclosure sit along the wall the golfer faces, usually the short wall in a rectangular room, since that gives the ball the shortest, straightest path to travel. The hitting area comes next, with room on both sides for a full swing and, in a shared or commercial bay, enough width to mirror that space for a left-handed player. The launch monitor's position depends on its type, as covered above, but it always needs a clear line of sight to the ball and the swing. Seating or a lounge area, where the room has one, belongs behind or to the side of the hitting area, out of the path of a mishit ball and far enough back that it does not crowd the golfer's backswing. Finally, the equipment, the sim PC, switcher and any receivers, belongs in a closet, cabinet or rack outside the hitting area itself, both to protect it from stray shots and to keep fan noise out of the room.
Traffic flow matters too, especially in a shared home bay or a commercial venue with guests moving in and out between rounds. Keep a clear path from the door to the seating area that does not cross behind an active golfer, and keep spectators and drinks away from the side of the hitting area where a mishit ball is most likely to travel. None of this changes the room's overall footprint, but it does change where the door, the seating and any walkway sit within that footprint.
Laying these zones out on paper before any drywall goes up is what turns a good room into a good bay. The diagram below shows one common layout: an equipment closet in a back corner, a projector on the ceiling, a lounge or seating area to the side, and the cable paths that connect them, planned as part of the room rather than added after the fact.
Cable paths and low-voltage rough-in
If the walls and ceiling are open at any point during a build, whether that is new construction, a renovation, or just a chance to run cable before finishing a basement, use that window to pull every low-voltage cable the bay will need. Doing this rough-in while the walls are open is far cheaper and far less disruptive than fishing cable through finished drywall later.
At minimum, pull a CAT cable from the equipment location to the projector mount, to each TV position the room will have, and to an input plate in the hitting area itself if the bay will ever need a guest input for a laptop or another device. Pulling one extra run to a spot you are not sure you will use costs very little at rough-in and a great deal more once the walls are closed.
Put power at the projector mount as well as a data cable. The HDBaseT receiver that sits at the projector end is powered over the same CAT cable by the switcher in the closet, so it needs no separate power supply of its own. The projector itself still needs its own power connection, so do not skip pulling an electrical circuit to the mount just because the receiver is powered over the cable.
Terminate every CAT cable to the 568-B standard on both ends, and avoid couplers in the run: a coupler is a common point of failure and a place for signal quality to drop, and Key Digital's own installation manuals call out both points directly. Label each run at both ends as you go, closet end and destination end, with what it is and where it goes. A bay with an equipment closet, a projector, a bay input plate and one or two TVs can easily have four or five CAT runs converging in the same panel, and an unlabeled tangle of cable is a headache the first time anything needs to be traced or serviced. Take a photo of the open walls with every run visible before the drywall goes back up, and keep it with the room's other project records; it is far easier to consult a photo later than to guess where a cable goes from a finished wall.
Small rooms, garages and basements
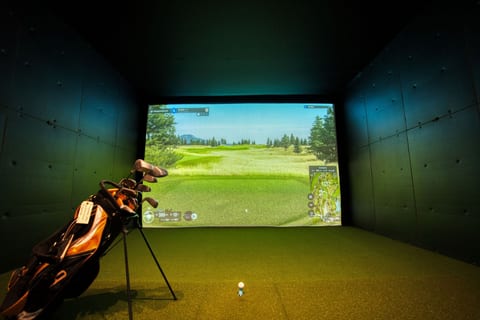
Not every simulator room starts out ideal, and a lot of home builds happen in a garage, a basement or a spare room that was not designed for the purpose. None of that rules out a workable bay, but each of these spaces comes with its own constraints worth planning around.
A room with a ceiling under 9 ft still works for many golfers, particularly with a shorter setup or with irons rather than a driver, but it changes which projector mount position and which launch monitor will fit comfortably. See the ceiling height guide for the tradeoffs at each height tier.
Garages bring their own obstacle: the door track and the opener. Both usually run across the ceiling near the door, exactly where a projector or a screen might otherwise want to go, so measure around them before you commit to a screen position or a mount point. An opener motor can also cut into the ceiling height available at the back of the garage, which matters if the hitting area ends up underneath it.
Basements bring a different set of obstacles: structural beams, ductwork and plumbing running across the ceiling, all of which can eat into the usable ceiling height at exactly the spot a projector or a screen needs it. Map these out before you assume the basement's stated ceiling height is available everywhere in the room, since a duct or a beam can drop the usable height by a foot or more in specific spots.
When a room falls short of the ideal ranges in any dimension, a smaller screen or an irons-only setup is often the practical answer, rather than trying to force a full driver swing into a room that cannot safely support one. A smaller screen needs less depth to fill the field of view, and playing irons only removes some of the ceiling height and swing-path demands that a driver creates.
Basements also tend to run more humid than the rest of a house, which is worth factoring into where the equipment closet goes. A sim PC and switcher tucked into a damp corner will have a shorter service life than the same equipment in a dry, ventilated closet, so if the basement has a persistent moisture problem, address it before finishing the room rather than after the equipment is installed.
Commercial multi-bay layouts
A commercial facility with several bays follows the same room-planning rules as a single home bay, multiplied across every room, with one added wrinkle: the cable runs are rarely identical from bay to bay.
Each bay gets its own switcher, and in most commercial builds the PCs live together in a central equipment room rather than inside each bay. That keeps the bays quiet and the equipment protected, but it also means every bay's video run has to travel from that central room out to its own projector, and the distance is different for every bay depending on where it sits relative to the equipment room. Lounge or bar TVs, where the venue has them, typically mirror whichever bay a customer wants to watch, using the same mirrored-output switcher already feeding that bay's projector.
Because the runs differ by bay, do not assume one signal path works for the whole facility. Measure the actual cable route to the farthest bay from the equipment room, not just the floor-plan distance, and let that longest run decide the switcher: a facility where every bay sits within 40 m of the equipment room can standardize on the KD-PS42 throughout, while a facility with even one bay beyond that distance, up to 100 m at 4K, needs the KD-UPS52U for that bay, or for the whole facility if standardizing on one part number matters more than saving cost on the shorter runs. The cable run calculator can help confirm which switcher fits once you know each bay's actual run length.
Standardizing on parts across a multi-bay facility pays off beyond the initial build. A venue where every bay uses the same switcher, the same input plate and the same cable labeling convention is far easier for staff to troubleshoot than one where each bay was wired a little differently as the project went along. Even where run length forces a mix of the two switchers, keep every other part of the wiring, connector types, labeling and plate style, consistent from bay to bay.
For the rest of the pre-wire and equipment checklist a commercial build works through bay by bay, see the guide for golf simulator installers.
Parts to plan into the layout
Beyond the launch monitor, screen and projector themselves, a handful of parts show up in most simulator rooms once the layout and cable paths are set. Two switcher options cover most bay distances, and the two input plates below let a bay accept a guest device without running a raw HDMI cable across the floor.
Parts to plan into the layout
| Part | Role in the system | Note |
|---|---|---|
| KD-PS42 | Bay switcher, 4K to 40 m | Includes KD-X40MRx receiver |
| KD-UPS52U | Bay switcher, 4K to 100 m, USB routing | Includes KD-X100MRx receiver |
| KD-X2x1WDTx | HDMI and DisplayPort input plate in the bay | Sold separately; powered over the cable |
| KD-X4x1WUTx | Input plate with USB 2.0, IR and RS-232 | Sold separately; powered over the cable |
Frequently asked questions
What size room do you need for a golf simulator?
Simulator makers commonly recommend about 10 to 12 feet of width at minimum and 14 to 16 feet ideally, about 15 feet of depth at minimum and 18 to 20 feet ideally, and a ceiling of 9 to 10 feet. Check the requirements of your launch monitor.
How far should the tee be from the screen?
About 8 to 12 feet is a common recommendation. It gives the ball room to reach the screen safely and leaves space for the enclosure.
Is a 12 by 12 foot room big enough for a golf simulator?
It is tight. Depth is usually the problem, because the golfer, the distance to the screen and the space for the launch monitor all need room. Measure carefully and check the depth your launch monitor requires.
Where should the golf simulator PC and equipment go?
In a closet, cabinet or equipment room outside the hitting area where possible. That protects the equipment, but plan the cable route to the projector and any TV at the same time as the room layout.
What should I pre-wire when building a golf simulator room?
Pull CAT cable from the equipment location to the projector mount, to any TV location and to an input plate in the bay, and put power at the projector mount. Terminate the CAT cable to 568-B on both ends and avoid couplers.
Can a garage work as a golf simulator room?
Often, if the ceiling height and width allow a full swing. Watch for the garage door track and opener, and plan where the equipment and cables will live.
Related guides
Questions about golf simulator room layout?
Send it to a Key Digital engineer. We reply within one business day.
Message sent
Thanks. A Key Digital engineer will reply to your email within one business day.