
Quick answer: A golf simulator setup has six parts: the space, a launch monitor, a screen and enclosure, a projector, a PC running the simulator software, and the signal and control wiring that connects them. Keep the PC out of the hitting area, run HDMI directly only when the projector is within roughly 15 to 20 feet, and use an HDBaseT switcher over one CAT cable for longer runs or a second screen.
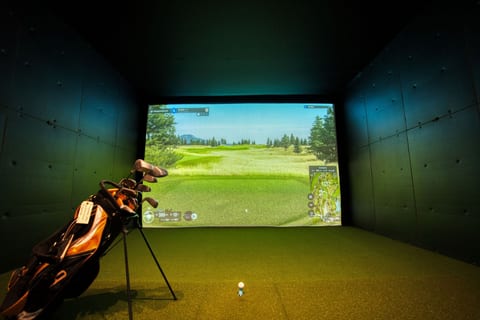
A home golf simulator setup and a commercial golf simulator installation both come down to the same six parts working together. Get the room, the launch monitor and the screen right and the golf sim setup still will not feel finished until the video and control wiring behind it is planned as carefully as the hardware in front of the golfer. That is the half of the project this guide walks through, section by section, from the moment the PC boots up to the moment the picture lands on the screen and, in many bays, on a second display at the same time.
What a golf simulator setup includes
Every bay, home or commercial, breaks down into the same six parts. None of them stands alone: the room limits the screen and projector throw, the PC drives the software, and the signal and control wiring is what actually gets the picture from the PC to every display in the room. Most buying guides spend nearly all of their time on the first five rows below and treat the last row as an afterthought. In practice, the last row is the one that decides whether the bay is reliable day to day, so the rest of this guide focuses on it.
| Part | What it does | Planning note |
|---|---|---|
| Space | Gives the golfer room to swing, the ball room to fly and a place to sit and watch | See the room dimensions and ceiling height guides before you commit to a room |
| Launch monitor | Measures the shot | Radar units sit behind the golfer and need more depth; camera units mount overhead or beside the hitting area. Check the maker's own specification for the exact space it needs |
| Screen and enclosure | Stops the ball and carries the image | Sized to the room and the launch monitor's field of view |
| Projector | Puts the course on the screen | See the projector setup guide for throw distance and mount position |
| Sim PC and software | Runs the course and the physics | Graphics requirements come from the simulator software maker |
| Signal and control | Carries video to every display and powers the system on | The subject of this guide |
Golf simulator room size at a glance
A room needs roughly 10 to 12 ft of width at minimum, with 14 to 16 ft considered ideal, and roughly 15 ft of depth at minimum, with 18 to 20 ft ideal, leaving about 8 to 12 ft between the tee and the screen (TruGolf, TrackMan). Ceiling height matters just as much: 10 ft is considered ideal, about 9 ft is a common minimum, 8.5 ft is workable for irons or shorter golfers, and 8 ft is treated as the absolute floor (TruGolf, Foresight Sports). A room at the small end of these ranges still works; it just narrows your options for launch monitor placement and projector throw. These same numbers also decide how far the video signal has to travel once the PC and projector are placed, which is the question the rest of this guide answers. For the full breakdown by dimension, see the room dimensions and ceiling height guides.
Where the sim PC should live
In the bay
Keeping the PC in the bay itself gives the shortest possible cable run to the projector, which is the simplest wiring option. The tradeoff is that the bay is a hot, noisy and occasionally dangerous place to keep a computer: heat and fan noise from the PC add to a small room, a mishit ball can find its way to the equipment, and a bay full of guests means curious hands near the tower. For a single home bay with one player at a time, these tradeoffs are often acceptable, especially if the PC can sit in a corner or behind the golfer rather than directly beside the hitting area.
In a closet or equipment rack
Moving the PC to a closet or an equipment rack protects it from ball strikes, heat and guests, and it is the standard approach in commercial venues with more than a bay or two. The tradeoff runs the other way: the video run from the PC to the projector gets longer, and a longer run changes which cable or extender will actually work. A rack also makes it easier to service the PC, update simulator software, or swap a component without disturbing the bay itself, which matters more once a venue is running multiple bays back to back.
Decide this first, because it sets the cable length every other wiring decision in the bay depends on. Once you know roughly how far the PC will sit from the projector, the cable run calculator below can help confirm which option fits.
Getting 4K from the PC to the projector
A passive HDMI cable is reliable for roughly 15 to 20 feet at 4K. That is enough for a PC kept inside the bay with a short, direct run to the projector. Once the PC moves to a closet or the projector is ceiling-mounted, the route usually gets longer than that: it has to climb the wall, cross the ceiling and drop back down, which adds up fast even in a modest-sized room.
Past that 15 to 20 foot mark, two options cover the rest of the distance. An active optical HDMI cable connects like an ordinary HDMI cable and carries 4K up to 100 m on a single run with no separate transmitter or receiver box, which suits a single PC feeding a single projector and nothing else. It is the simplest way to solve distance alone, and it adds no switching, no mirrored output and no control features beyond the picture itself. Where the bay also needs a second screen, more than one source, or a run past what a single fiber cable covers, an HDBaseT presentation switcher sends the picture over one CAT cable instead: the KD-PS42 reaches 4K up to 40 m or 1080p up to 70 m, with its KD-X40MRx receiver included, and the KD-UPS52U reaches 4K up to 100 m or 1080p up to 150 m in long range mode, with its KD-X100MRx receiver included. In both cases the receiver at the projector end is powered over the same CAT cable by the switcher, so there is no separate power supply to run up to the ceiling. A single CAT cable is also far easier to fish through a wall cavity or a ceiling plenum than a thick HDMI cable, which is worth factoring in even on a run short enough for either option.
Which of the two switchers to choose usually comes down to distance and whether USB has to reach the bay. The KD-PS42 suits bays where the projector is within 40 m of cable at 4K, with the PC in a nearby closet. The KD-UPS52U is the better fit when the equipment room sits further from the bay, when the run has to cross more of a commercial building, or when a USB touchscreen or keyboard needs to operate at the bay itself alongside the video.
Two signal paths for a simulator bay
Choose the KD-PS42 path for runs up to 40 m at 4K. Choose the KD-UPS52U path for runs up to 100 m or when USB has to reach the bay.
| Part | Role in the system | Note |
|---|---|---|
| KD-PS42 | 4-input switcher for bays up to 40 m at 4K | Includes KD-X40MRx receiver |
| KD-X2x1WDTx | HDMI and DisplayPort guest plate in the bay | Sold separately; powered over the cable |
| KD-UPS52U | 5-input switcher for runs up to 100 m at 4K, with USB routing | Includes KD-X100MRx receiver |
| KD-X4x1WUTx | Bay wall plate that also extends USB 2.0, IR and RS-232 | Sold separately; powered over the cable |
| KD-AOCH328P | Fiber HDMI cable for a single source, no switching | 4K up to 100 m |
Distance is not the only thing that can go wrong on a long CAT run. Two displays, or a display and a receiver, that do not agree on resolution and audio format can leave a PC defaulting to the wrong output. The KD-PS42 and KD-UPS52U carry an internal library of 15 EDID handshakes plus the option to copy a connected display's own EDID directly, and both run what Key Digital calls a Full Buffer System, which manages TMDS re-clocking, HDCP authentication and the EDID handshake together. That is what keeps a 40 or 100 meter HDBaseT run behaving, from the PC's point of view, like a short local HDMI connection.
Adding a lounge or bar TV
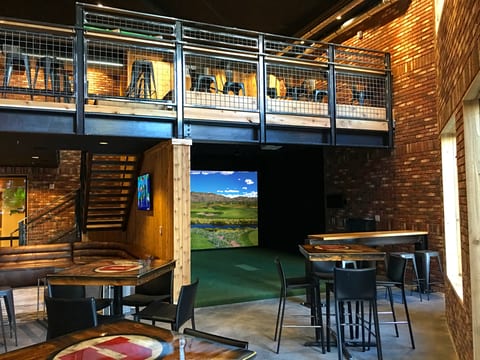
The KD-PS42 and KD-UPS52U mirror their HDMI and HDBaseT outputs, so the source you select shows on both outputs at the same time. That means the projector in the bay and a TV in the lounge or at the bar show the same round with no splitter in the signal path, and no separate box to add or maintain just to duplicate the picture. Both switchers are HDCP 2.2 licensed, so protected streaming content plays through cleanly as long as the display on the other end also supports HDCP 2.2. For a closer look at running a second display off the same switcher, see adding a second screen.
One-button start and shutdown
CEC Manager sends power, volume and mute commands to connected displays without any extra control wiring, and it sends a power on command to the display the moment a source is selected. Auto-switching selects a newly connected source on its own and moves off it again once it is disconnected, so plugging in a laptop or a cable box brings it up without anyone touching a remote, and manual control can be enabled instead when a fixed source assignment is preferred. Control runs by push button, IP, RS-232, IR, the KD-App or Compass Control Pro, so a bay can start with a single push button by the door or a single tap in an app, and a staff member does not need to know anything about the underlying equipment to turn a bay on for a guest. One caution: check that your specific projector model supports CEC before relying on it for automatic power on.
Home bays and commercial bays
A home golf simulator setup usually keeps things simple: one PC, one projector, and maybe a single TV, all running on the KD-PS42 path described above. A commercial golf simulator venue adds a few more moving parts, but the underlying signal chain does not change.
In a commercial installation, PCs typically live together in an equipment room rather than in each bay, and each bay gets its own switcher feeding the projector plus any lounge TVs. Guests in the bay also get an input plate: the KD-X2x1WDTx for HDMI and DisplayPort, or the KD-X4x1WUTx, which also extends USB 2.0 (both are sold separately and are powered over the cable). On the KD-UPS52U path, a USB touchscreen or keyboard can sit at the bay as well, with USB routing set by one of four USB modes. Because every bay uses the same switcher and control options, a venue with many bays can standardize on one set of parts and one control scheme rather than reworking the design for each room. For the full checklist a commercial installer works through bay by bay, see the installers guide.
Golf simulator setup, step by step
- Measure the room: width, depth and ceiling height against the ranges above
- Choose the launch monitor and confirm the space it needs
- Choose the screen and enclosure to fit the room and the launch monitor
- Choose where the PC will live, in the bay or in a closet or rack
- Choose the projector and its mount position
- Measure the actual video route from the PC to the projector and pick the signal path
- Wire the system and test every display before the drywall or trim goes on
- Add the second screen and set up one-button control
For the full wiring walkthrough, including cable types, termination and testing, see how to wire a simulator bay. Steps 1 through 5 are worth locking down before any cable is bought, since changing the room, the PC location or the projector mount afterward usually means re-measuring the run and possibly swapping the signal path chosen in step 6. Testing every display before the walls close up also catches an EDID or HDCP mismatch while it is still easy to swap a cable or reseat a connector, rather than after the trim and drywall are finished.
How long is your cable run?
Open the full HDMI cable run calculator to email yourself the result.
Frequently asked questions
What equipment do you need for a golf simulator setup?
A room with enough ceiling height, width and depth, a launch monitor, an impact screen and enclosure, a projector, a PC or device running the simulator software, and the cabling that carries video and control between them.
Where should the golf simulator PC go?
Outside the hitting area where possible. A closet or equipment rack protects the PC from ball strikes, heat and guests, but it lengthens the video run, so plan an extender or fiber HDMI cable if the projector is more than roughly 15 to 20 feet away.
Can I use a long HDMI cable to reach a ceiling projector?
Only for short runs. A passive HDMI cable is reliable for roughly 15 to 20 feet at 4K. For longer routes, use an active optical HDMI cable or an HDBaseT extender over one CAT cable.
How do I show the round on a TV as well as the projector?
Use a switcher with mirrored outputs. The Key Digital KD-PS42 and KD-UPS52U send the selected source to an HDMI output and an HDBaseT output at the same time, so the projector and a lounge TV show the same picture.
Can the projector and TV turn on automatically?
Key Digital presentation switchers include CEC Manager, which sends power, volume and mute commands to connected displays without extra control wiring and sends a power on command when a source is selected. Check that your projector supports CEC.
Do home and commercial golf simulator setups need different wiring?
The signal chain is the same. Commercial bays usually keep PCs in an equipment room, add lounge or bar TVs, and give guests an input plate in the bay. Home bays often keep the PC close to the screen with a single display.
Related guides
Questions about golf simulator bay wiring?
Send it to a Key Digital engineer. We reply within one business day.
Message sent
Thanks. A Key Digital engineer will reply to your email within one business day.