
Quick answer: Mount the projector where it fills the screen without the golfer casting a shadow, usually a short-throw model on the ceiling behind or above the tee. Then plan the video run: a passive HDMI cable is reliable for roughly 15 to 20 feet at 4K, so a projector farther from the PC needs an active optical HDMI cable or an HDBaseT extender.
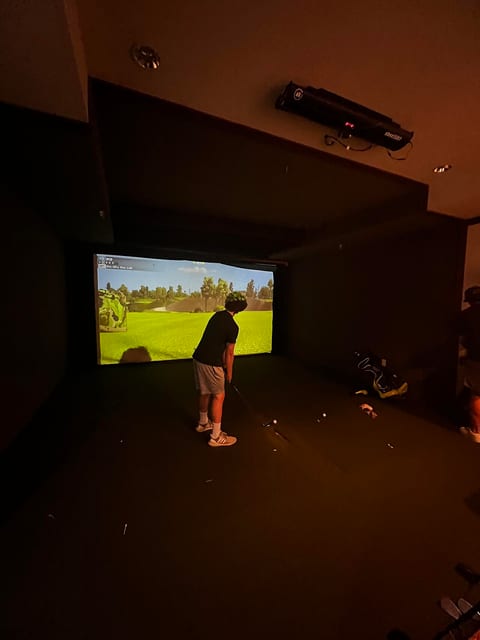
A golf simulator projector gets picked twice: once for the unit itself, brightness, resolution and throw, and once for where it hangs in the room. Buying guides spend nearly all of their attention on the first decision and treat the mount and the cable run as an afterthought that someone figures out during installation. That is backward, because the mount position and the throw ratio math decide each other, and both of them decide how far the video signal has to travel before it ever reaches the screen. This guide works through the projector decisions in order: throw ratio and room depth first, then brightness and resolution, then where the unit actually hangs, and finally the cable run that has to reach it once the mount is fixed.
Throw ratio and room depth
Throw ratio is the number on a projector spec sheet that actually tells you whether a unit will work in your room. It is the distance from the lens to the screen divided by the width of the image, so a projector with a throw ratio of 0.5 sitting 5 feet from the screen produces an image 10 feet wide. A short-throw projector has a low throw ratio, which means it fills a large screen from close range, exactly the situation created by a projector mounted a few feet behind the hitting area in a home golf simulator room.
Whether a short-throw projector for a golf simulator is the right call comes down to room depth. In a room shallower than about 15 feet, a standard throw projector often cannot get far enough back from the screen to fill it, so a short-throw model is usually the practical choice (Carl's). In a longer room, a standard throw unit has more distance to work with, though a short-throw model still fills the screen from closer in when floor or ceiling space near the screen is limited.
Throw ratio math is specific to each projector, so do not rely on a rule of thumb alone once you are choosing an actual unit. Every projector maker publishes a throw calculator that takes a target screen width and returns the exact distance range the lens needs from the screen. Run your room's numbers through that calculator before you buy, since the mount position in the next section depends on getting this distance right. A projector hung too close overshoots the screen or spills light onto the side walls, and one hung too far away leaves the image too small or drops the golfer's own shadow across part of the picture.
Brightness and resolution
Brightness matters as much as resolution for a golf simulator picture, because the screen sits in a room that is rarely fully dark. Simulator makers commonly recommend 3,000 lumens or more for a projector feeding an impact screen (Foresight Sports), and a bay with windows, overhead lighting, or a bar area visible from the tee needs more than that baseline to keep the course picture crisp instead of washed out under ambient light.
Resolution is a separate decision from brightness, and it changes what the signal path behind the projector has to do. A 1080p picture is forgiving of long cable runs and older equipment. A 4K60 picture needs a signal path that carries 18 Gbps end to end, from the PC's video output through every cable, extender or switcher, all the way to the projector. Any weak link in that chain, not the projector alone, can drop the picture back to 1080p or cause it to drop out. Check the exact throughput a given resolution and refresh rate need with the HDMI bandwidth calculator before you commit to a projector and a cable run together.
Ceiling mount or floor position
Most golf simulator setups with a projector mount it on the ceiling, behind or above the tee, because that position keeps the unit clear of a full swing. About 4 feet behind the tee is a common starting point for a ceiling mount (Carl's), though the exact spot still depends on the throw ratio math above and on your ceiling height.
The alternative is a floor or enclosure position, which usually calls for an ultra short-throw unit sitting close to the screen and close to where the ball flies. That keeps the projector clear of the swing from a different direction, at floor level instead of overhead, but it also puts the unit closer to ball flight, which is worth weighing against a ceiling mount out of the way entirely.
Whichever position you choose, settle it before you touch a cable. The mount position is what sets the actual route the video signal has to travel, and that route, not the straight-line distance between the equipment closet and the projector, is what decides which cabling option will work.
The cable run to a ceiling projector
A ceiling-mounted projector almost never sits in a straight line from the sim PC. The cable has to leave the equipment closet, reach a wall, climb that wall to the ceiling, and travel across the ceiling to the mount before dropping down to the projector. Measure that actual route, not the floor-plan distance between the closet and the mount, because the difference adds up fast once a run climbs a wall and crosses a ceiling.
Here is a worked example with illustrative numbers only: 10 feet from the PC to the wall, 9 feet up the wall to the ceiling, and 20 feet across the ceiling to the mount comes to 39 feet total. That is already well past the roughly 15 to 20 foot range where a passive HDMI cable is reliable at 4K, even though the closet and the projector might look close together on a floor plan.
Once the route is longer than a passive cable can carry, two approaches cover the rest of the distance. An active optical HDMI cable connects like an ordinary HDMI cable, with no separate transmitter or receiver box to mount, and carries 4K up to 100 m on a single run; the KD-AOCH328P is built for exactly this kind of single-source run to a ceiling projector. Where the bay also needs a switcher for more than one source, an HDBaseT presentation switcher sends the picture over one CAT cable instead: the KD-PS42 reaches 4K up to 40 m with its matched KD-X40MRx receiver, and the KD-UPS52U reaches 4K up to 100 m with its matched KD-X100MRx receiver. In both cases the switcher powers the receiver over the same CAT cable, so there is no separate power supply to run up to a ceiling mount. For more on why passive copper runs out of headroom in the first place, see the HDMI cable max length guide.
HDBaseT receiver at the projector
Some projectors list an HDBaseT input directly on the unit, which looks like it should let any HDBaseT transmitter connect straight into the projector. In practice, HDBaseT products are not always interchangeable between brands, so a transmitter from one manufacturer is not guaranteed to work cleanly with a receiver built into another manufacturer's projector.
The dependable approach is to run a matched Key Digital receiver at the projector end and connect that receiver's HDMI output into whatever HDMI input the projector already has, rather than relying on the projector's own HDBaseT port. This is also why the wall plate transmitters in a Key Digital system are built to work with specific receivers: the KD-X2x1WDTx wall plate, for example, works only with the KD-X40MRx receiver or the KD-PS42 switcher, and it is sold separately from either. Keeping the transmitter and receiver matched removes the guesswork of whether a projector's built-in HDBaseT port will cooperate with a given switcher. Browse the full lineup under HDMI over CAT6 extenders.
Signal parts for a ceiling projector
| Part | Role in the system | Note |
|---|---|---|
| KD-PS42 | Switcher in the closet, 4K to 40 m | Includes KD-X40MRx receiver |
| KD-X40MRx | Receiver at the projector for the KD-PS42 | Included with KD-PS42; powered over the cable |
| KD-UPS52U | Switcher for runs to 100 m at 4K | Includes KD-X100MRx receiver |
| KD-X100MRx | Receiver at the projector for the KD-UPS52U | Included with KD-UPS52U; powered over the cable |
| KD-AOCH328P | Fiber HDMI cable, single source | 4K up to 100 m |
Turning the projector on with the system
A golf simulator bay works best when starting it does not require anyone to hunt for three remotes. CEC Manager, built into Key Digital presentation switchers, sends a power on command to the connected display the moment a source is selected, so choosing the sim PC as the active source can wake the projector at the same time without a separate step.
Auto-switching adds to this by selecting a newly connected source on its own, which is useful when a bay occasionally takes a laptop or another device as a second input alongside the sim PC. Not every projector honors CEC commands the way a television does, so check that your specific projector model responds to CEC before relying on it for automatic power on. A projector that ignores CEC still works fine in the system; it just needs its own remote, a wall switch, or another control method for power instead of relying on the switcher.
Adding a second screen without handshake problems
Many bays add a second screen, a TV in a lounge or at a bar, showing the same round as the projector. The KD-PS42 and KD-UPS52U mirror their HDMI and HDBaseT outputs, so the source you select appears on both outputs at the same time, with no splitter added to the signal path.
Two displays on one switcher can disagree about what they support, and that disagreement is where a handshake problem shows up: a black screen, a lower resolution than expected, or protected content that will not play. Both switchers are HDCP 2.2 licensed, so streaming content plays cleanly as long as the display on the far end also supports HDCP 2.2. For resolution and audio format, both switchers carry an internal library of 15 EDID handshakes, plus the option to copy a connected display's own EDID directly, so the source can be set to a format that both the projector and the second screen accept instead of guessing at it. For the full walkthrough on wiring a second display, see adding a second screen.
Frequently asked questions
What is the best position for a golf simulator projector?
Usually on the ceiling behind or above the hitting area, where it fills the screen without the golfer casting a shadow and stays clear of the swing. The exact spot depends on the projector throw ratio and the depth of your room.
Do I need a short-throw projector for a golf simulator?
In most home rooms, yes. A short-throw projector fills a large screen from a short distance, which suits rooms with limited depth. Check the projector maker throw calculator against your room before you buy.
How bright should a golf simulator projector be?
Simulator makers commonly recommend 3,000 lumens or more, and more in rooms with ambient light. Resolution matters too: a 4K picture needs a cable path that carries 18 Gbps.
How do I run HDMI to a ceiling-mounted projector?
Measure the full route from the PC to the mount, including the climb up the wall and the run across the ceiling. If it is longer than roughly 15 to 20 feet at 4K, use an active optical HDMI cable or an HDBaseT extender over one CAT cable.
Will the projector turn on when the simulator starts?
It can. Key Digital presentation switchers send a CEC power on command to connected displays when a source is selected. A projector that does not support CEC needs another control method.
Related guides
Questions about golf simulator projector wiring?
Send it to a Key Digital engineer. We reply within one business day.
Message sent
Thanks. A Key Digital engineer will reply to your email within one business day.